Setting up SES correctly for email sending is a multi-step process. This will take a while so grab a cup of coffee (or tea) and let’s get started :)
In this post we will be covering the essentials of setting up a robust production-grade SES system with Configuration Sets, Event Destinations, SNS Topics, Cloudwatch to capture bounces and complaints, and Account Suppression Lists.
Add your Domain as a verified identity
To get started, we need to verify an email address or a domain with SES. We recommend verifying an entire domain so you have the flexibility of changing the email address if needed.
You can verify your domain with SES by adding the SES related CNAME records to your domain’s DNS. (These records are visible once you go through the steps to add a verified domain to your SES account.)
Remember that if you remove these CNAME records post-verification, your domain will no longer be a verified identity under SES. So keep those CNAME records in the DNS settings until you want to send emails from SES under that domain.
Create a Configuration Set
Once you have verified a domain with SES, you can move on to the next step of creating a configuration set.
A configuration set helps you specify how you wish to capture and act on email-related events. You can subscribe to all email events like “Send”, “Delivery”, “Open”, “Click”, “Bounce”, etc. You can create one from the “Configuration Sets” section under SES.
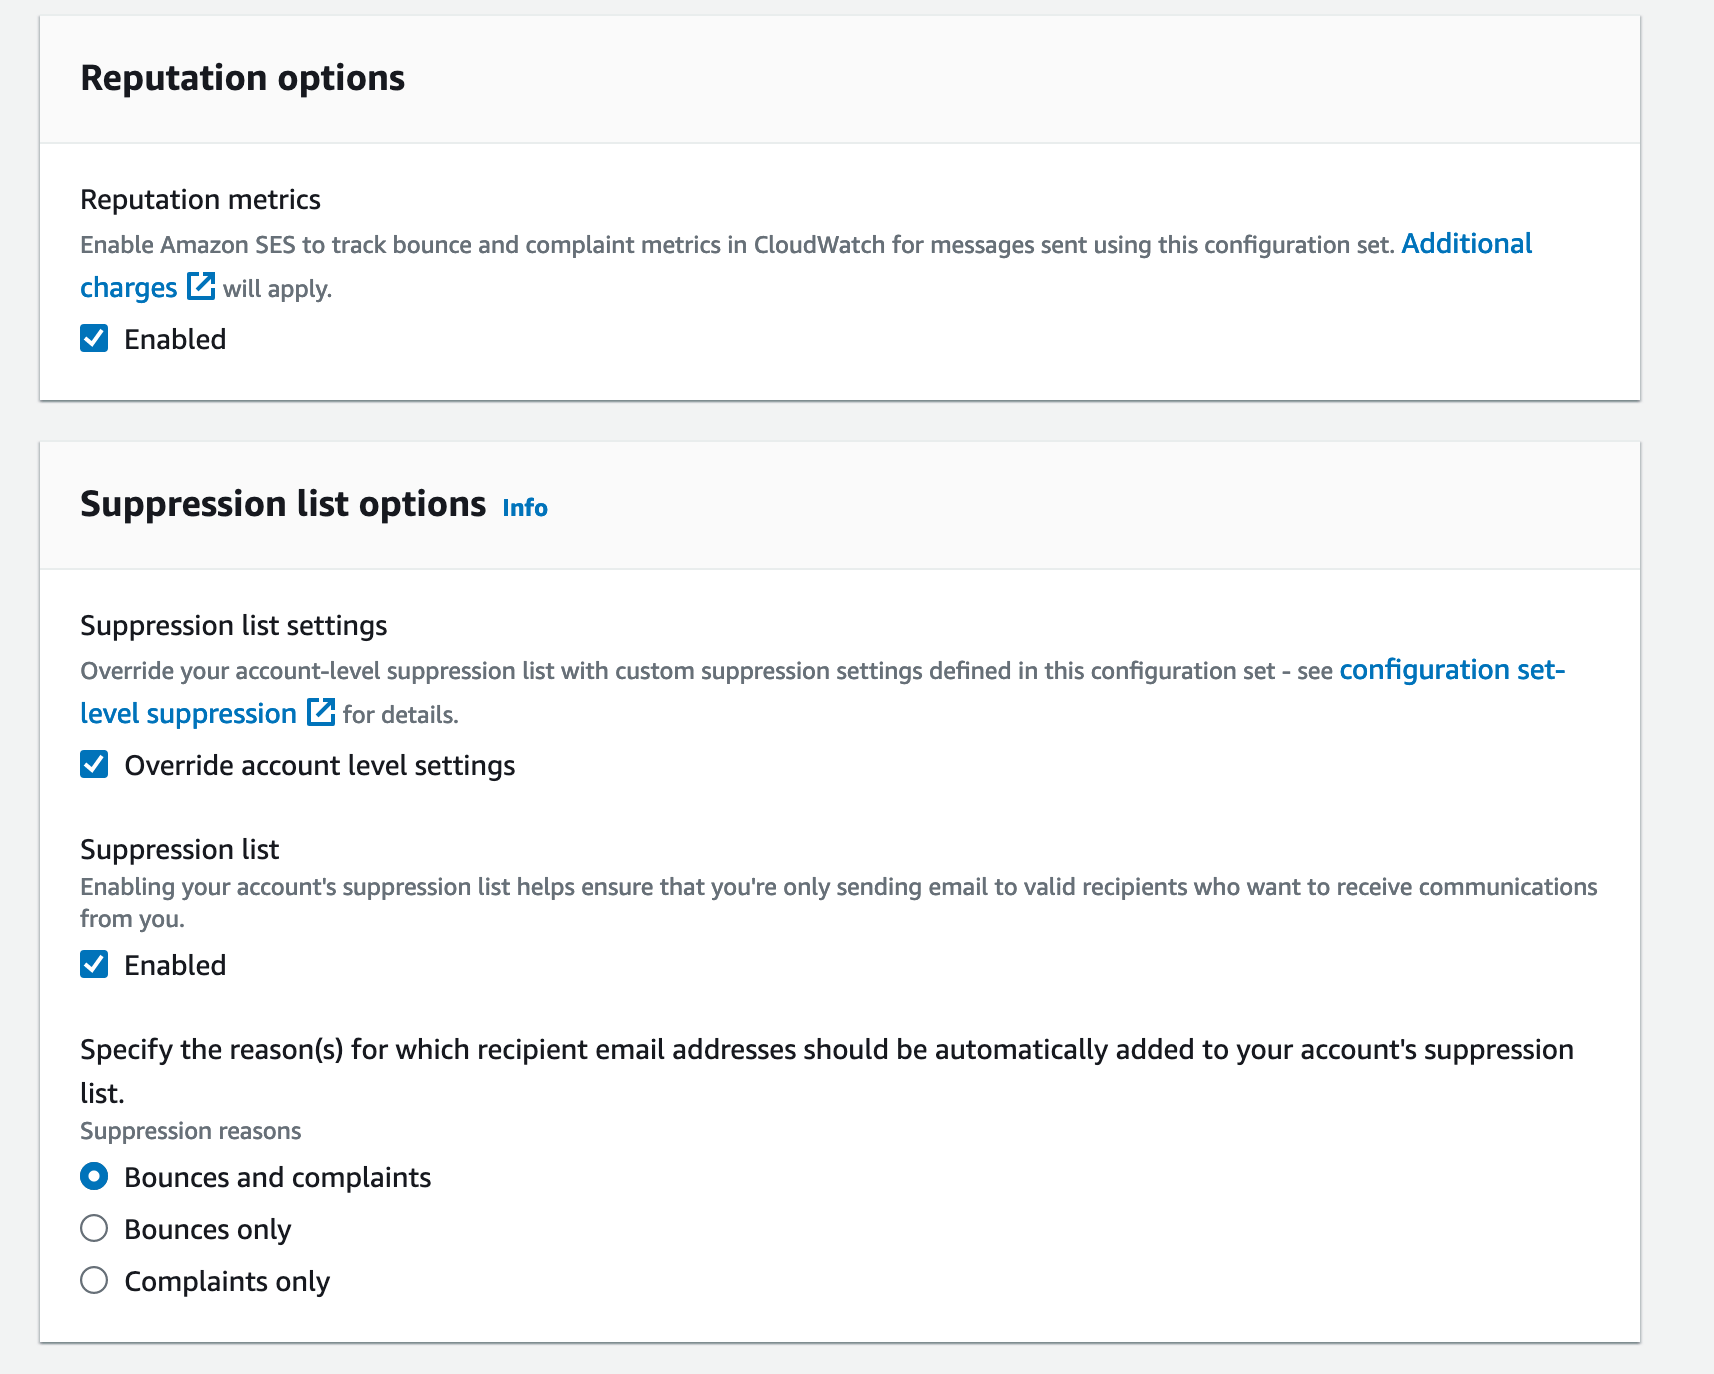
Make sure to check the option for “Reputation options” (This enables SES to track bounce and complaint metrics in CloudWatch for this Configuration set.)
Make sure to also check the “Override account level settings” under “Suppression list options”. Then check the “Enabled” option for “Suppression list” and finally select “Bounces and complaints” for reasons for which recipient email addresses should be automatically added to your account’s suppression list.
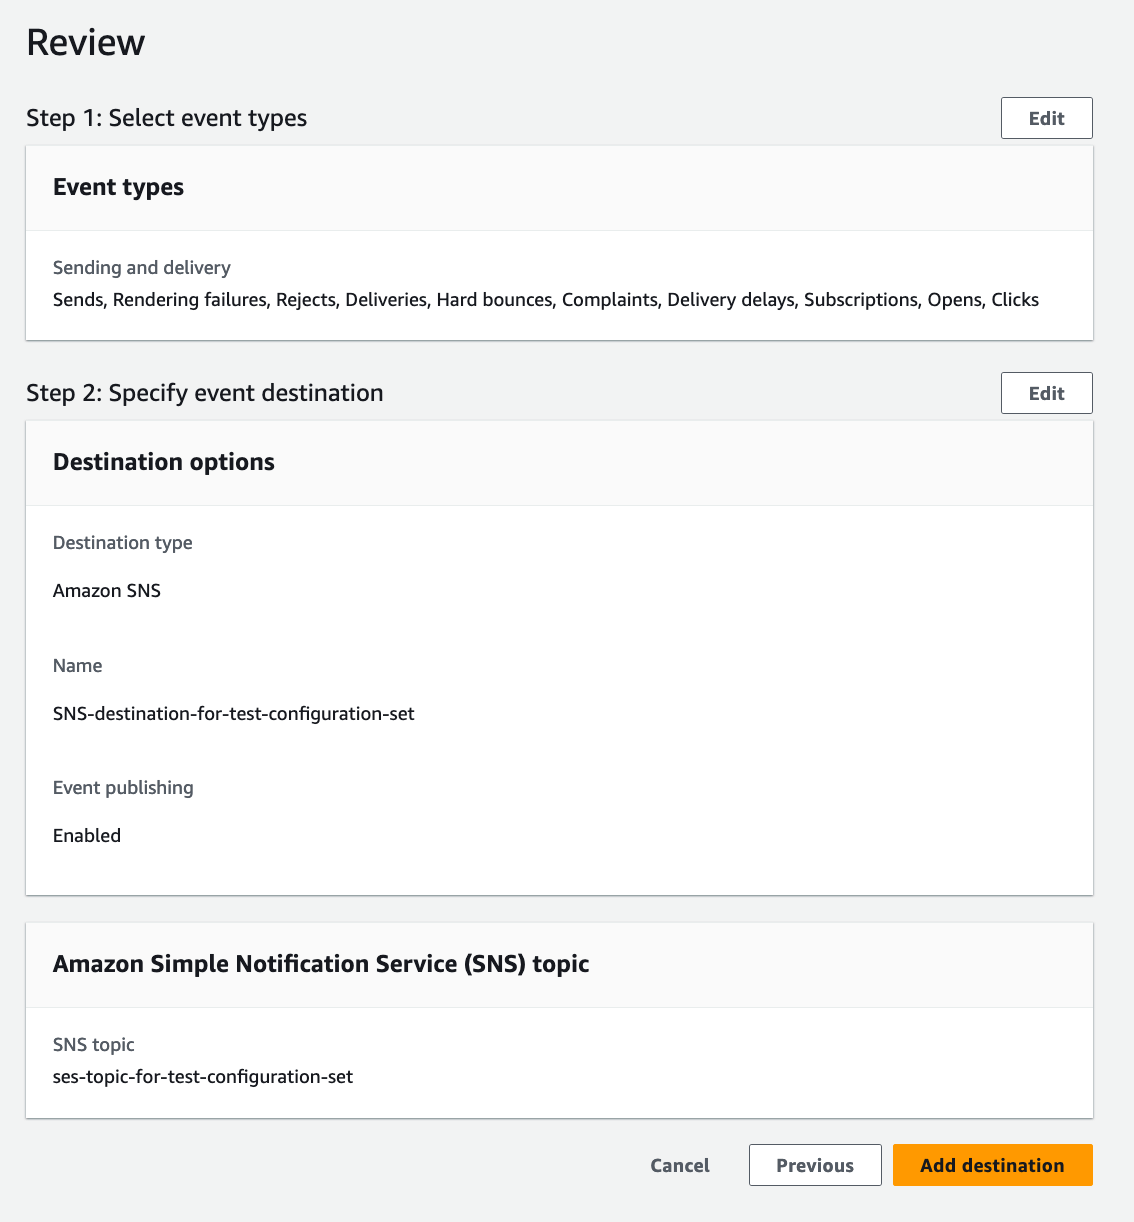
Add an Event Destination to your Configuration Set
Once we have created a Configuration Set, now we need to add an event destination to it.
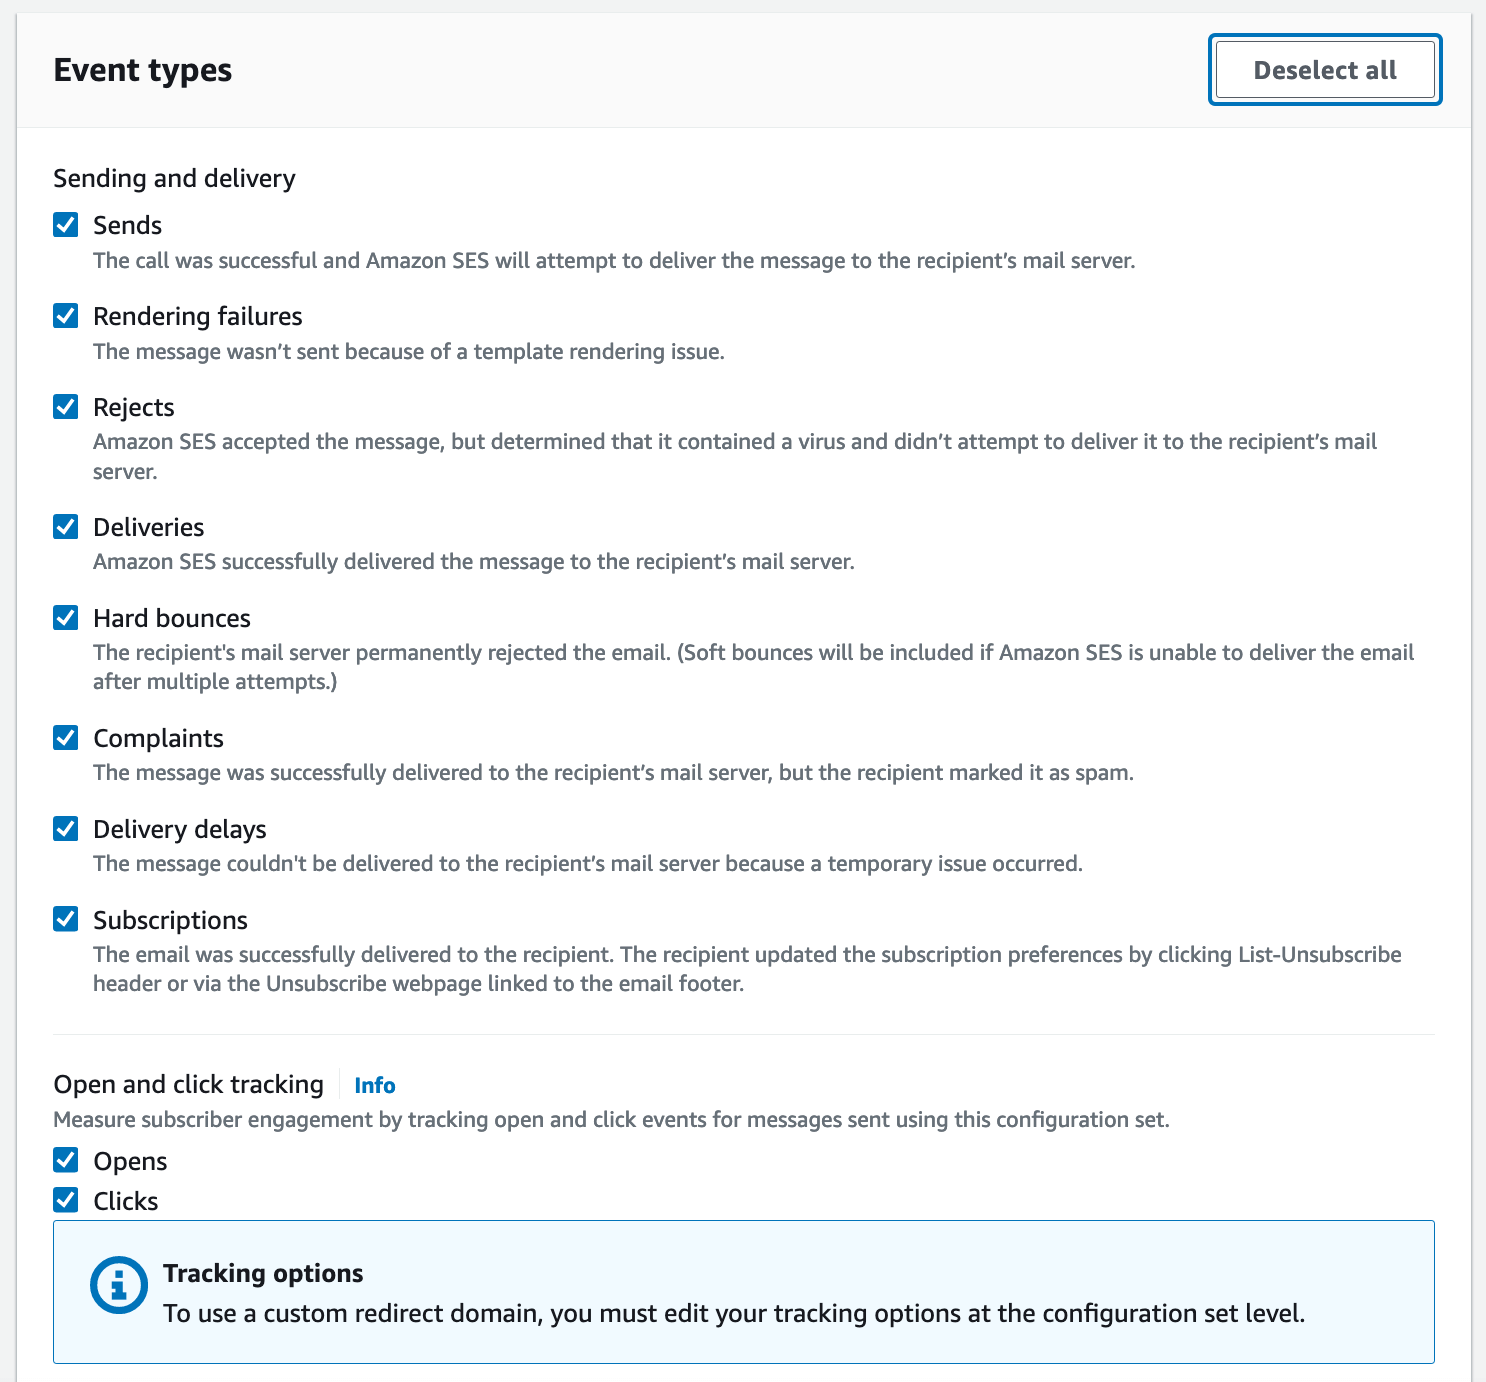
Head over to the “Event Destinations” tab under the newly created configuration set and hit “Add Destination” and select all the available options.
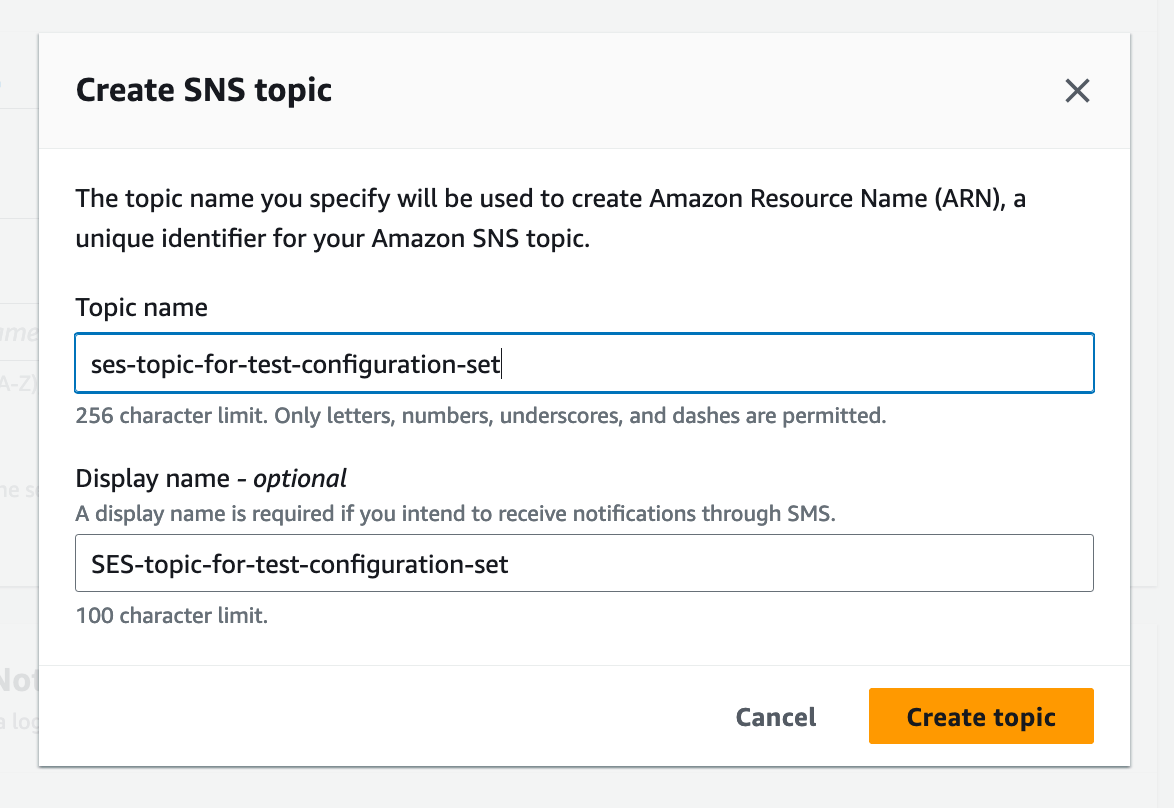
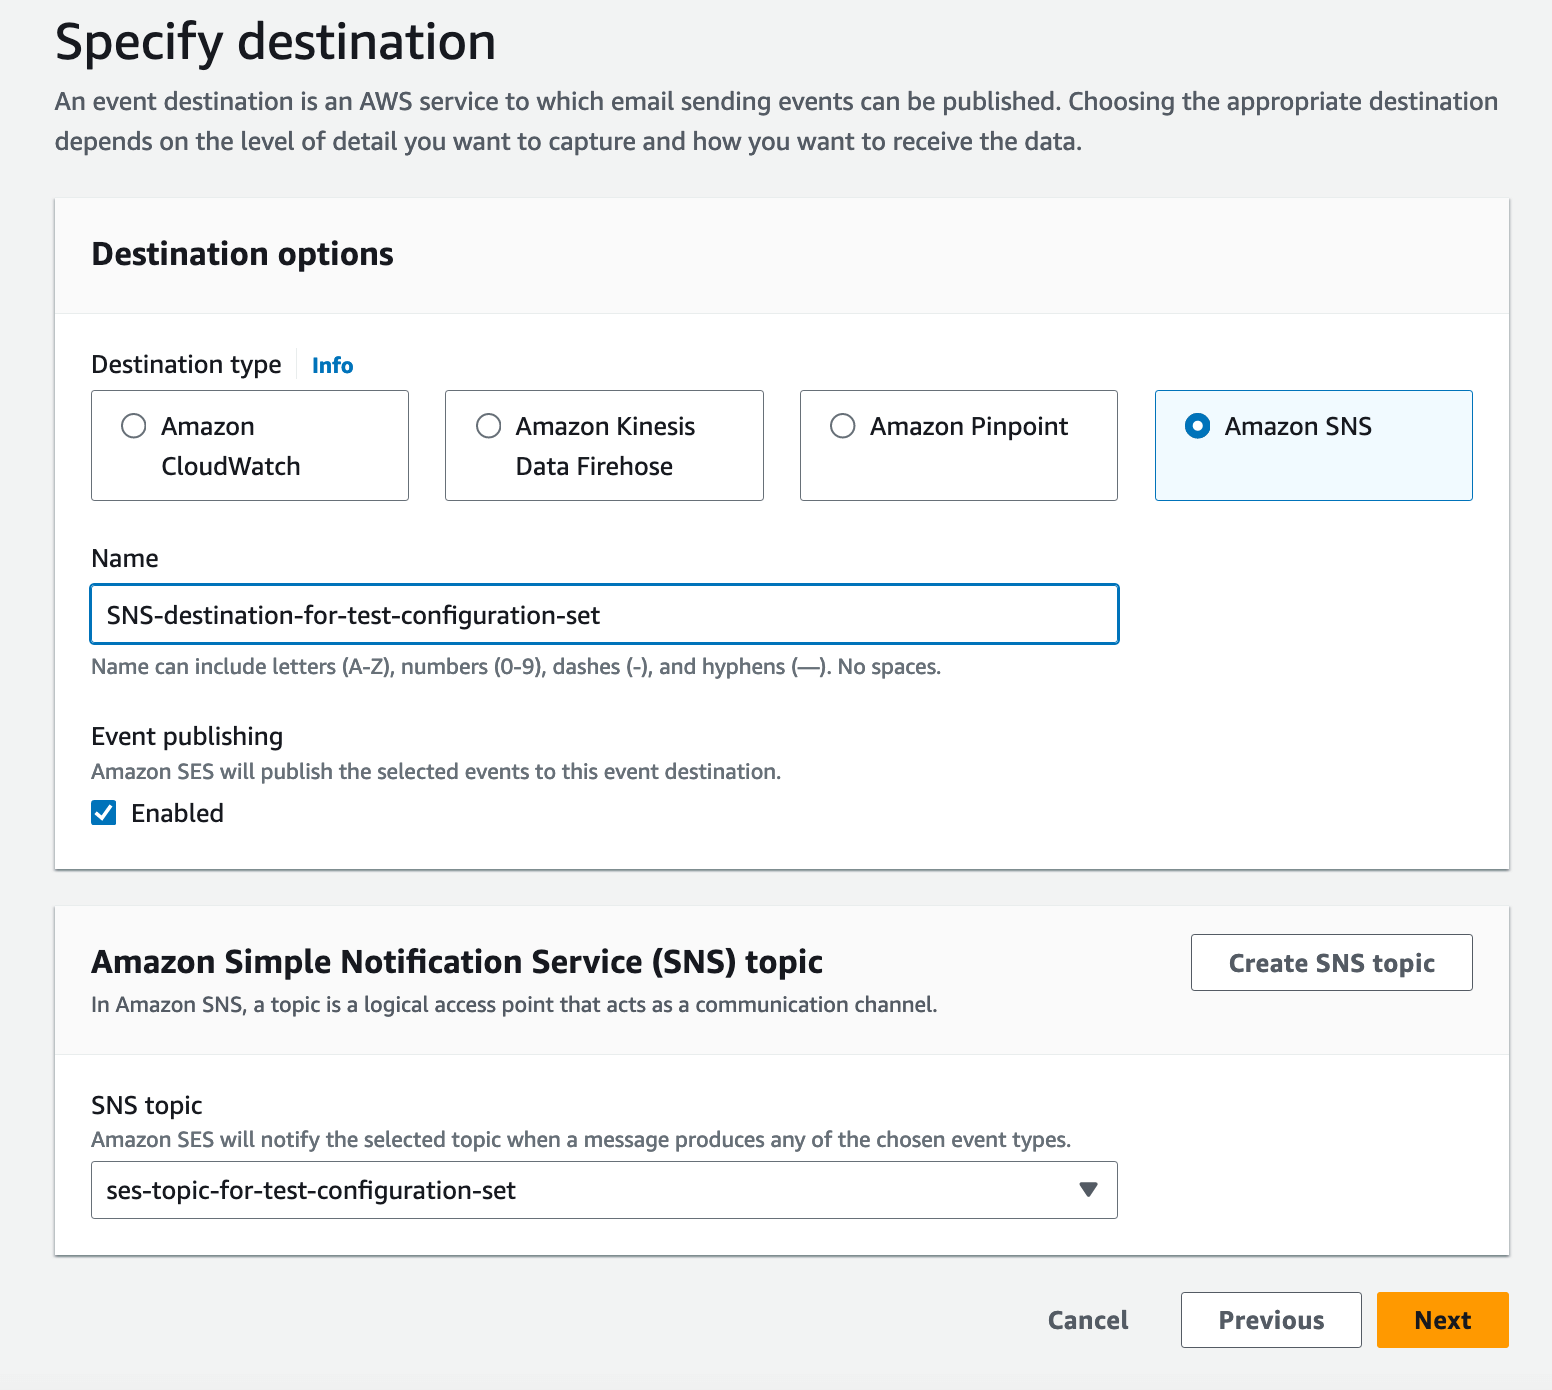
Next, select “Amazon SNS” and create a new topic using the handy “Create SNS topic” option below. You can choose “Amazon SQS” as an event destination as well - but in this post, we will be using SNS as our primary destination.
Once you create the SNS topic, select the same topic from the dropdown box.
Now give your Event Destination a name and make sure the newly created SNS topic is selected under it.
Now review and hit the “Add destination” button.
Validate your Event Destination
Now that we have created a configuration set and added an Event Destination to it, the next step is to validate our SNS topic.
Head over to “Amazon SNS” and find the newly created SNS topic “ses-topic-for-test-configuration-set” in my case. Then click on the topic and you should see a screen similar to the one below.
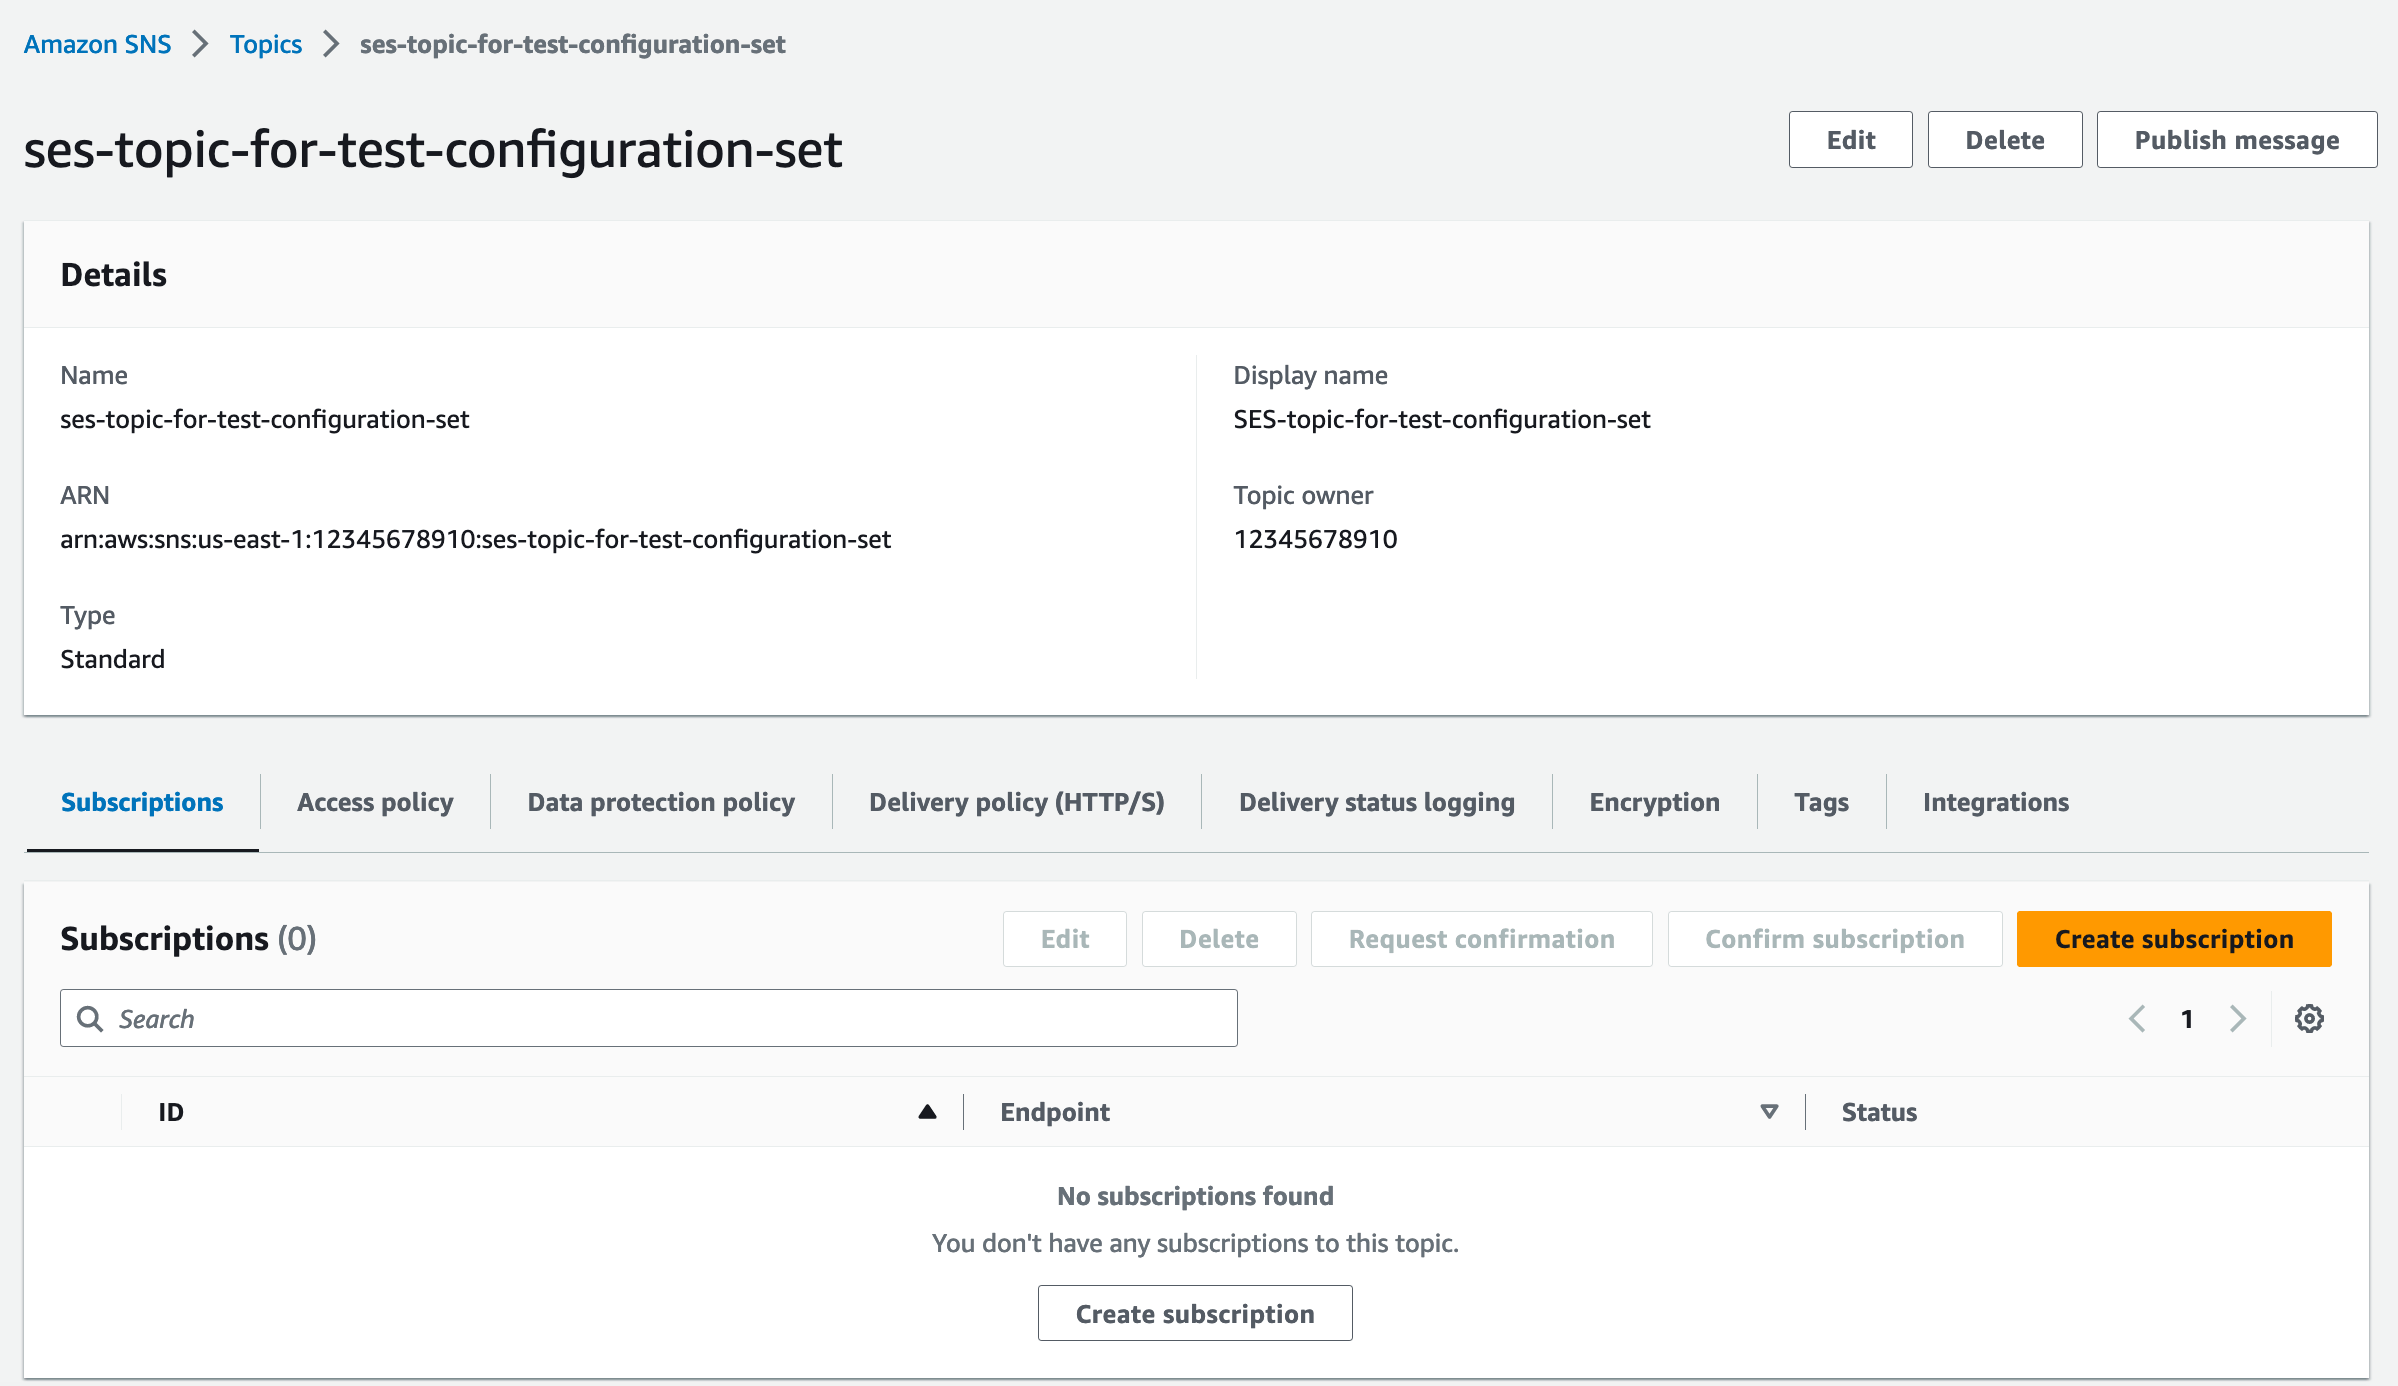
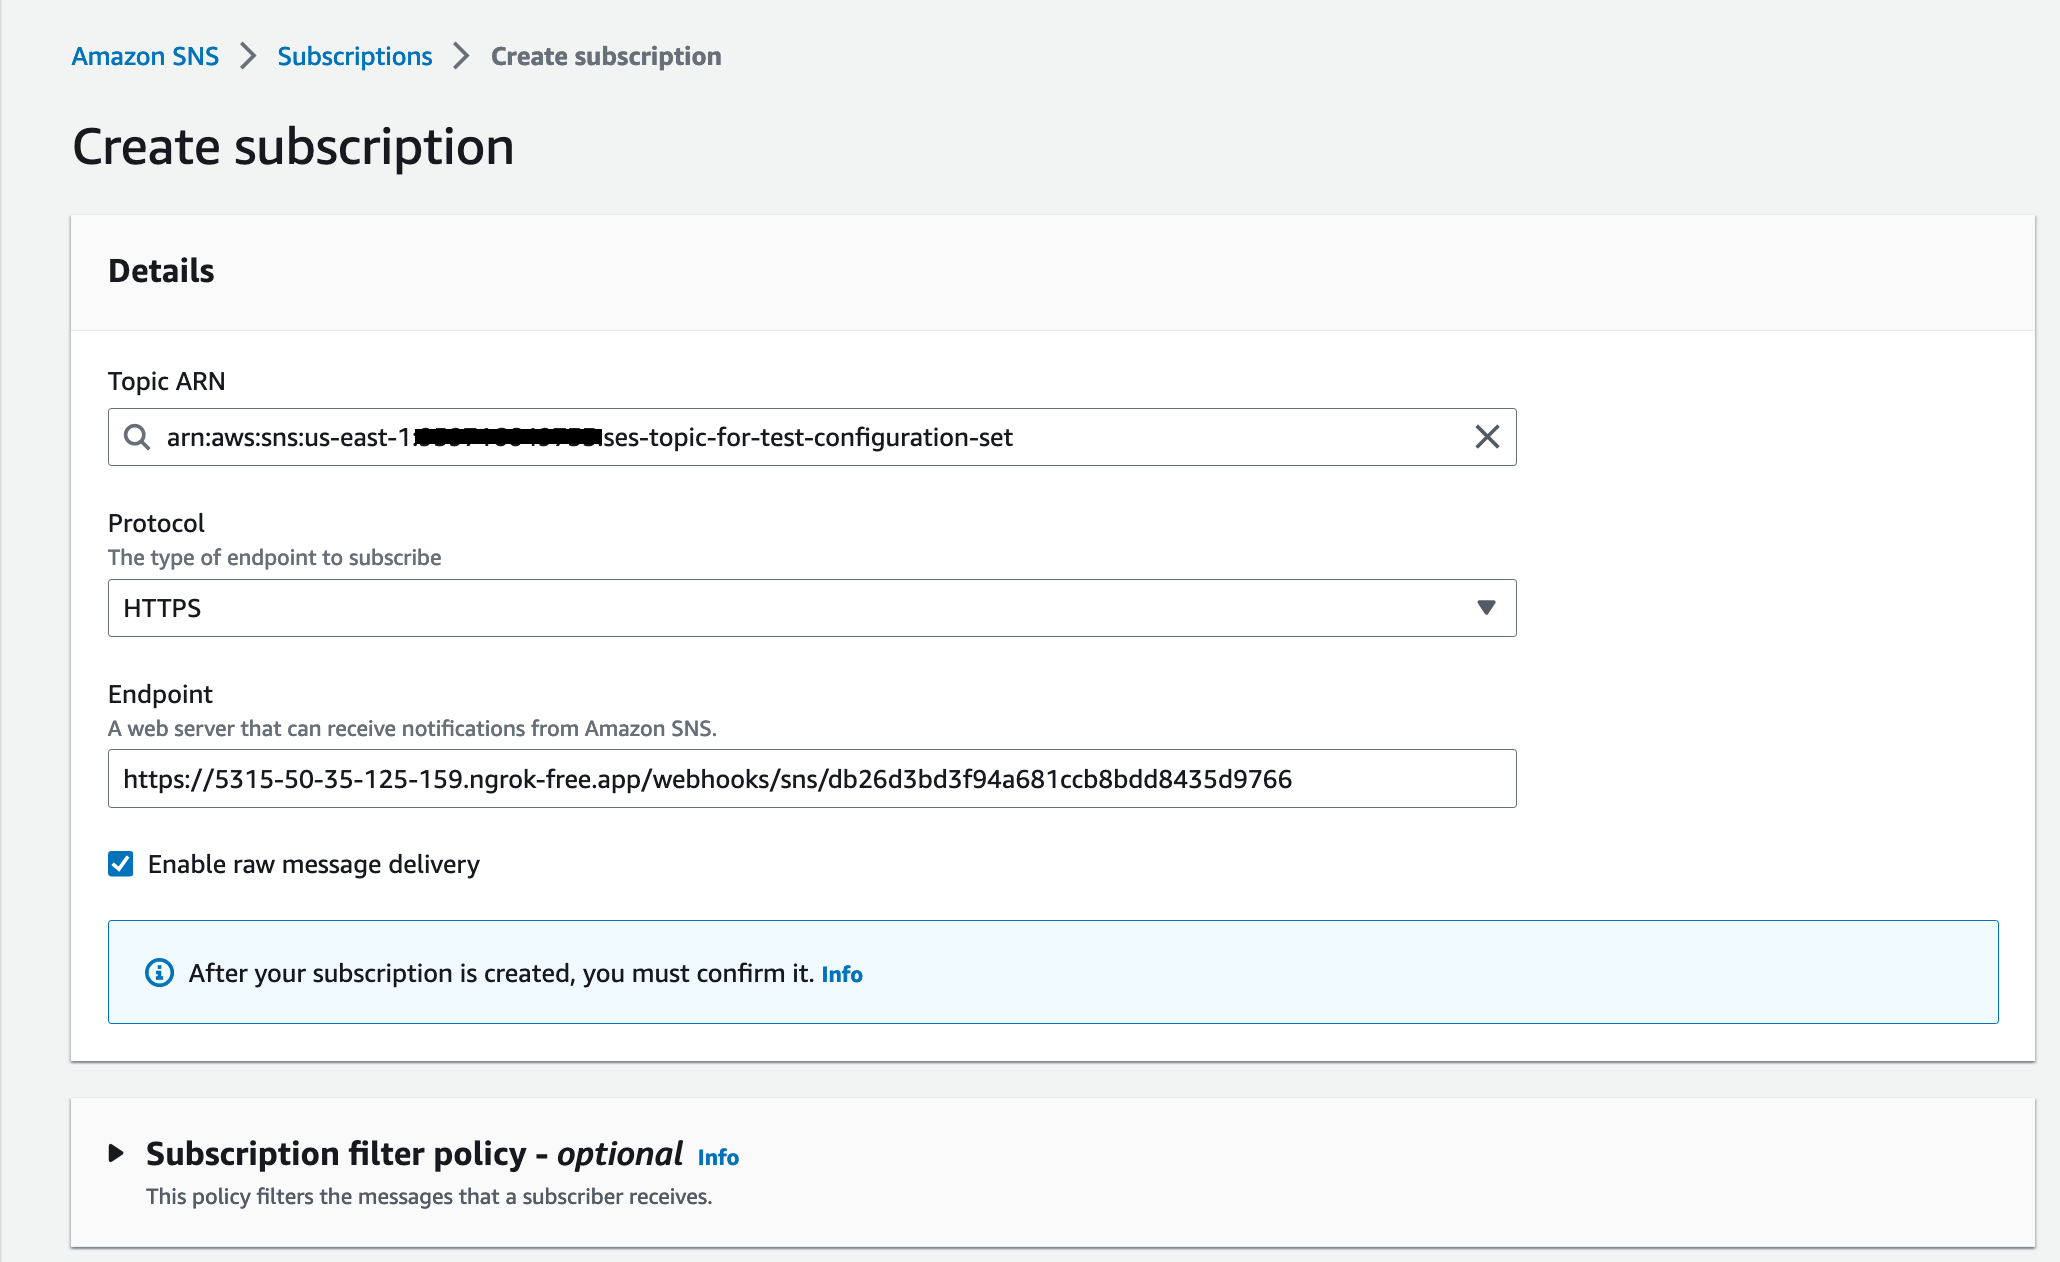
Now hit the “Create Subscription” button to start creating a subscription.
Do not change the Topic Arn. Now select HTTPS as the protocol and select your website’s endpoint that will receive and validate the subscription.
While you are developing locally, you can use ngrok (https://ngrok.com/) to expose a local port and use that as the endpoint here. We highly recommend using ngrok for this local setup to validate your SNS topic subscriptions.
Using ngrok, you can expose a localhost website using a command similar to the below one.
ngrok http http://127.0.0.1:39000
The above command exposes localhost port 39000 via a secure ngrok endpoint that AWS SNS can call.

Forwarding https://7cdd-50-35-125-159.ngrok-free.app -> http://127.0.0.1:39000
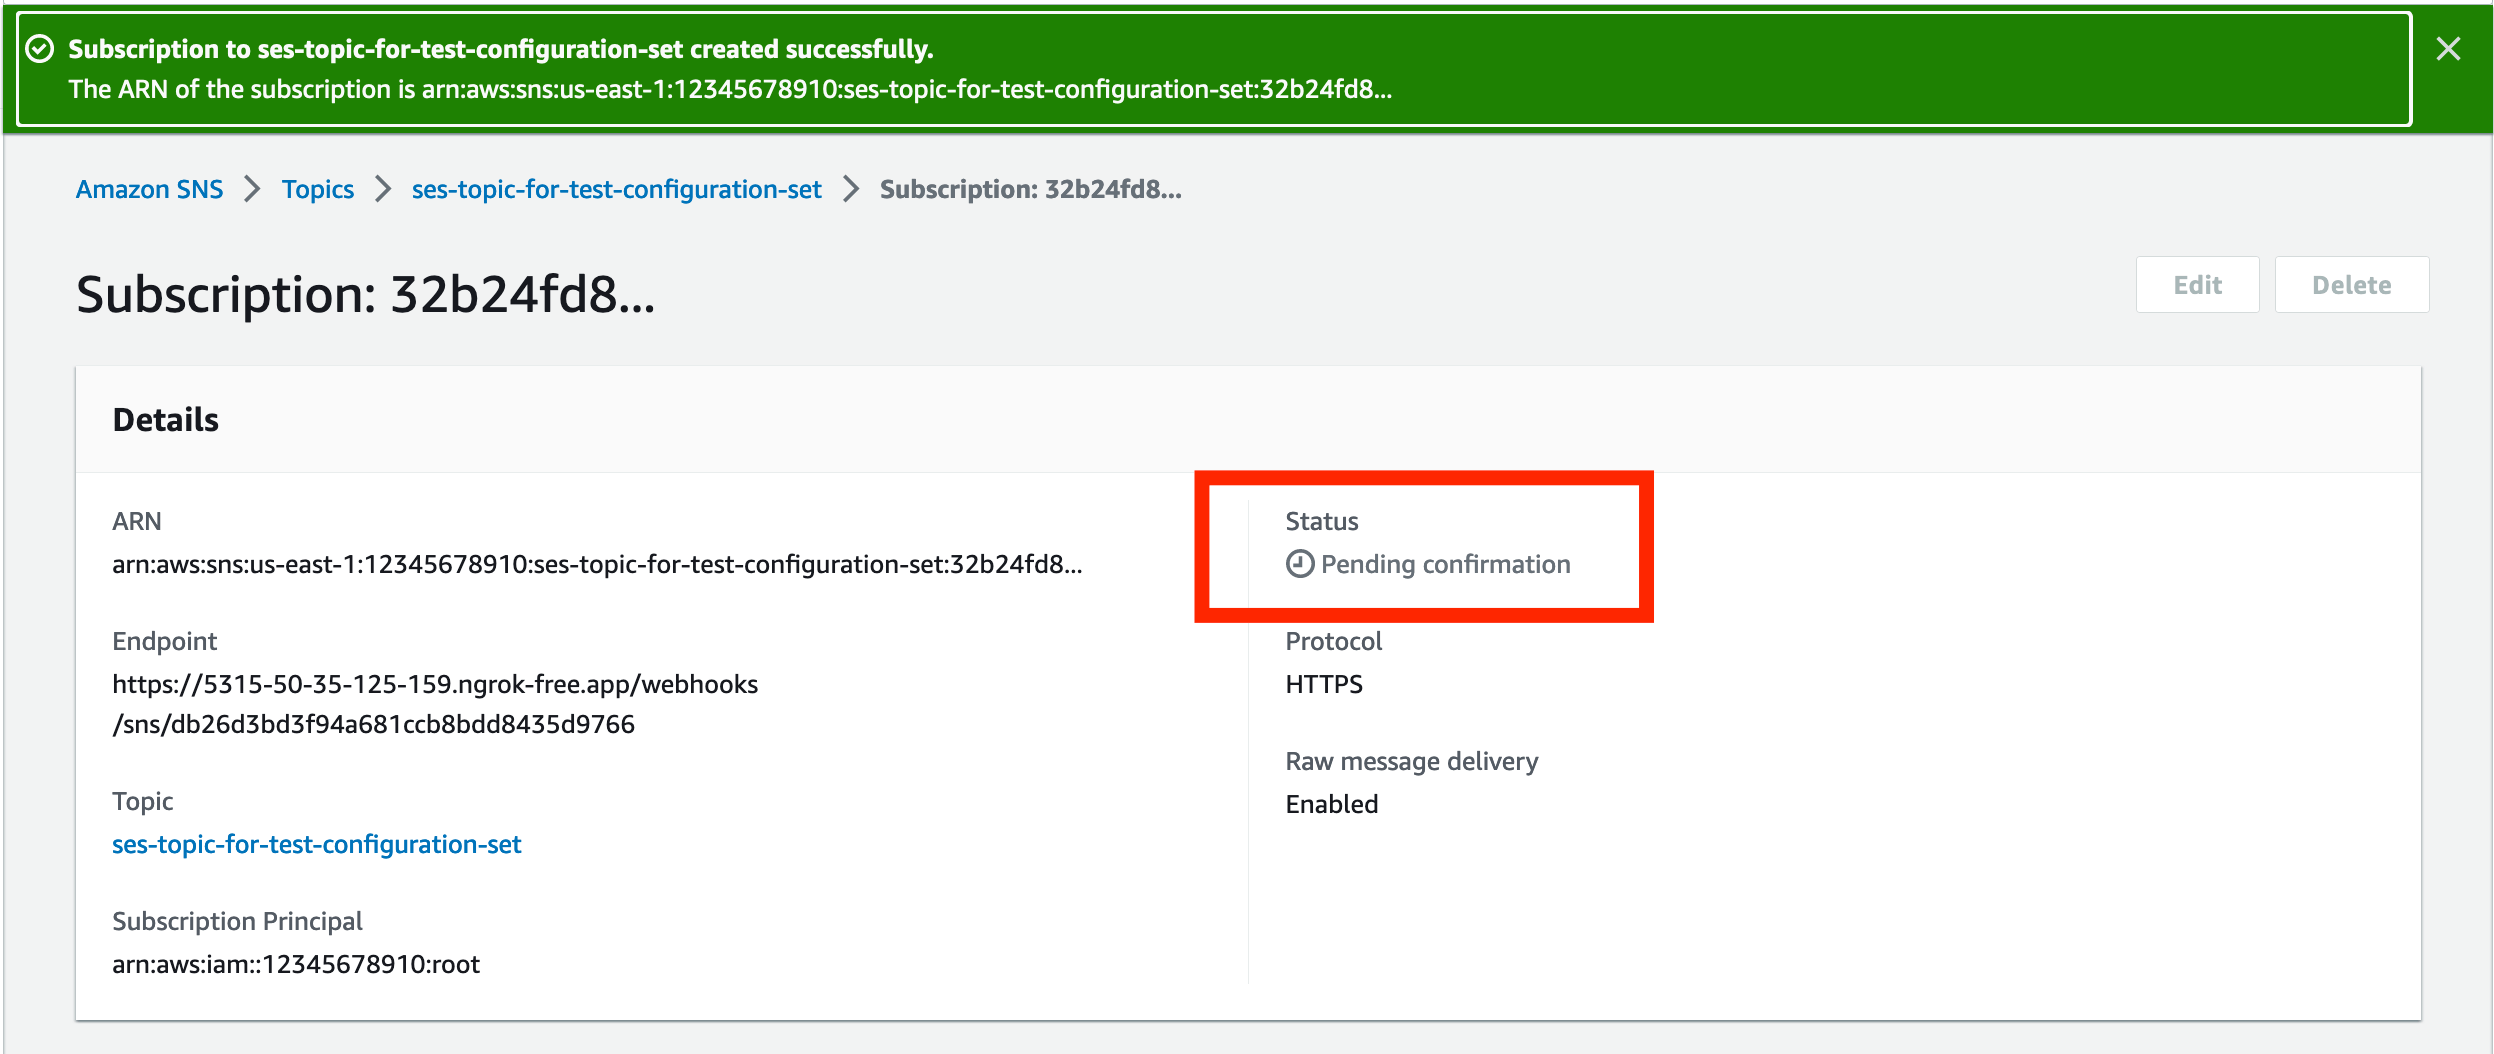
Now, hit the create subscription button and you will see a success message. You will notice that the subscription status says “Pending Confirmation”
As soon as you enter the above details, SNS sends you a “SubscriptionConfirmation” message via a POST request. The “SubscriptionConfirmation” message contains a “SubscribeURL”. You need to send a GET request to this “SubscribeURL” to confirm your SNS subscription. Using PHP, you can do so via the file_get_contents method.
file_get_contents($message['SubscribeURL']);
Once done, you will see the status of your subscription change to “Confirmed”. Once your subscription is confirmed, SES will notify SNS which will in turn notify your endpoint of all the email-related events you have subscribed to.
Congrats! you have successfully configured your SES.
At Pendable, we have built all this and more tools around scheduling your emails in the future, logging your emails, and adding dynamic priorities to them. Do give us a try :)